

PHOTOGRAPHY
SHOTLIST
Use this as a guide of the photos we are looking for, but don’t let this become a routine and reduce shooting photos down to a number. Stay fresh and capture the breadth of the event. In taking photos, be intentional to capture diversity in age, gender, and ethnicity.
EVERY WEEKEND/EVENT CAPTURE
+ 6 shots of worship (full band, individual team members, close up & wide)
+ 6 shots of people worshipping (hands in the air, genuine moments of people encountering Jesus, etc)
+ 4 wide shots of the room
+ 4 shots of preaching (2 close ups / 2 wide)
+ 2 shots of MC (1 close / 1 wide)
+ 3 shots per person during baptism (1 in baptismal pre-baptism, 1 coming out of water, 1 receiving prayer inside or out of baptismal)
+ 4 shots of City Kids (kids worshipping, engaging during lesson time)
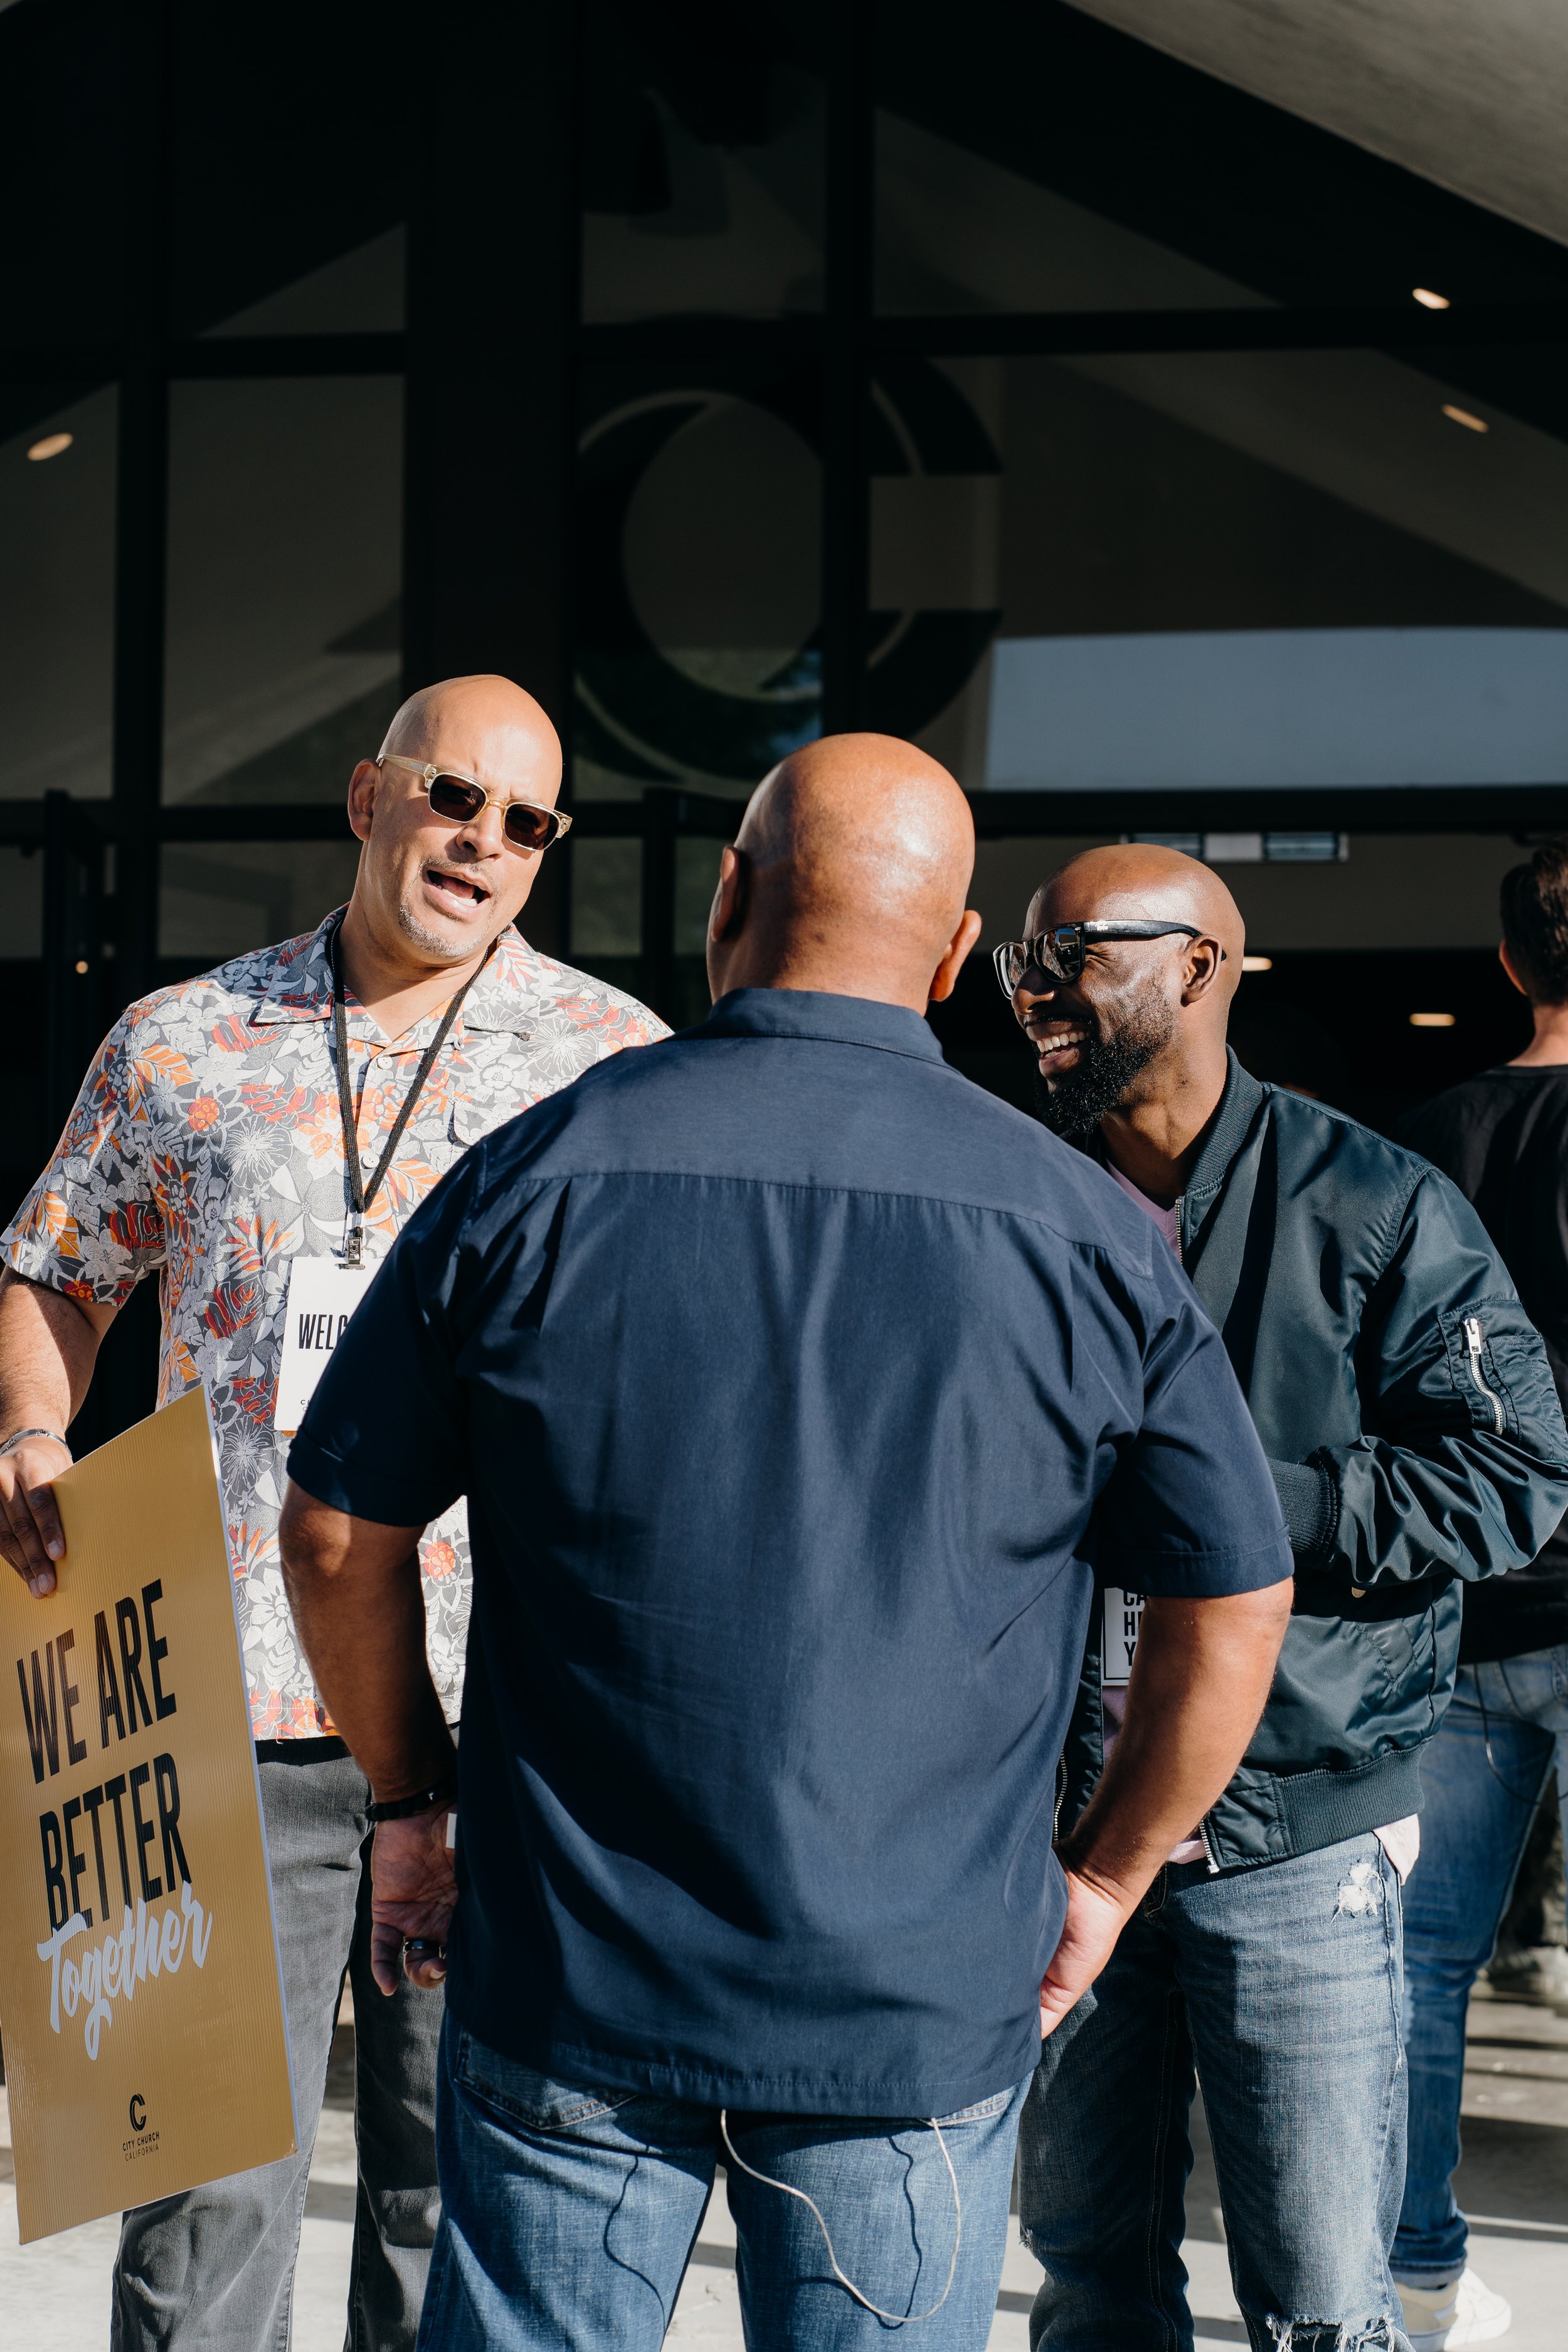
+ 6 shots of authentic moments (guest experience team serving & welcoming guests, engaging conversations, smiles, hugs, high-fives, etc)
+ 4 shots of behind the scenes (studio & live production team)
TO-DOS
• Wear dark clothing all & close-toed shoes at all times
• Charge your batteries in between services (as needed)
• Store personal items out of site in designated storage areas
• Always shoot in RAW & color
• Pray for salvations & HAVE FUN!
EDITING STYLE
It’s important for our culture that the photos taken at City Church California have the same look and feel. City Church California’s style of editing is a natural saturated look, that focuses more on boosting exposure and contrast while cutting highlights where necessary. This would be more of a “rule of thumb” for edits depending on the photo. Do not over-stylize or un-saturate photos as your only submission.
Begin photo edits with City Church California’s starting preset, main adjustments should be in lighting (exposure, highlights, low lights, whites, and blacks).
WHAT SERVICES LOOK LIKE
SUNDAY
7:45am - Photographer call time (check in with technical director in Media Room, check settings, grab a battery & SD card)
8:00am - Production meeting in auditorium
8:15am - Grab shots of guests arriving & hanging out pre-service
8:30am - Capture service (worship, MC, first 3-5m of sermon)
9:45am - Capture people hanging and conversing outside
10:30am - Capture more worship as needed, or grab shots of City Kids
11:30am - Start editing
12:15pm - Complete editing & upload on box
THURSDAY
6:00pm - Photographer call time (check in with technical director in Media Room, check settings, grab a battery & SD card)
6:15pm - Grab shots of guests arriving & hanging out pre-service
6:30pm - Capture service (worship, speakers, and prayer)
7:15pm - Start editing
7:45pm - Complete editing & upload on box
CAMERA SETTINGS
+ Set Proper White Balance
Auditorium color temp: 5600k
+ Manual Setting
Inside - high iso, low shutter speed 1/125, low aperture
Outside - low iso, low aperture, higher shutter speed
+ Edit Photos in Lightroom on church or personal system
+ Export Photos (.jpg)
Export photos (jpg) with metadata (in Lightroom classic this is a selectable item)
PHOTOS WE LIKE
WORSHIP EXPERIENCES


CROWD SHOTS


SPEAKING SHOTS


AUTHENTIC MOMENTS & EXPRESSIONS


TIPS
ATTRIBUTES TO CONSIDER
+ Shooting Angles
+ Artistic Perspective
+ Dynamic Shots
+ Natural Lighting
+ Composition
+ Telling Story
+ Open Space
PHOTOGRAPHY DO’S
+ Capture the best in people and the venue
+ Get creative, but not abstract
+ Capture the unique personality of our pastors
+ Be aware of production and camera crew
+ Respect other teams
ETIQUETTE
+ Get the shot, but don't distract
+ Be mindful of first time guests
+ Respect the individual worship experience
WHAT TO SHOOT?
How do I decide my next shot and where do I need to be to get it?
Know the program & venue. The first two songs of worship are usually fast and energetic songs. Making educated guesses based on your knowledge of the program and the venue can mean the difference between mediocre photos and a fantastic ones.
Check out past photos. Looking at past photos on City Church California’s sites, will give you an idea of the shooting conditions, lighting design and even the behaviour of your subject. Once armed with this information, you can go in with an idea of what photographs to take and where you need to be to take them.
Stay open-minded. Even if you go in with a well-informed plan, it is extremely important to remain open-minded and creative while shooting. Reducing the art of photography to a checklist of techniques and shots (like the ones listed here) will quickly leave you jaded and your work mediocre.
Ask yourself questions. A lot of the best photos in live event photography are made of the combination of luck and skill. Some photographers visualize the next photo and choose the right settings and lens to create it. What we usually see is a series of photos with one image that illustrates a personal artistic vision better than the others. When you look at a series of photographs, which would you choose? Why is it better than the others? Asking and answering these questions of your own work will define your photographic style.
A FEW MORE TIPS
Make a mental shoot list. Make a list of WHAT to shoot, not HOW to shoot it. This means nothing gets missed and you will have more time to keep an eye out for great photo opportunities and moments. The more prepared you are, the more you can deviate from your list.
Anticipate the moment. Often there are only a few seconds to capture what is happening, so look at all possibilities. Not only for light and composition, but for things to photograph as well. Details can also be important to tell the story of the moment or send the right message.
Be prepared. You don’t want to be changing batteries and memory cards when a spontaneous moment is unfolding. If you’re not prepared, the moment will pass you by.
Look ahead. Looking ahead for a great shot about to unfold can ensure a better image. For example: During transitions, move to your next position for shooting what is coming up next on stage.
Know the conditions. Knowing location and lighting conditions will help you to pre-visualise the event.
FOCUSING
Getting in-focus photographs during worship time can be difficult. To be successful, you need to master the autofocus characteristics of your camera and lenses.
The lighting during sessions can be simultaneously elaborate and low light, wreaking havoc on your camera’s ability to correctly judge focus. Autofocusing errors can lead to completely out-of-focus photos, as well as instances when the camera focuses on something other than you intend (like a microphone stand). Both kinds of focusing issues can be minimized with basic knowledge regarding how your camera decides what to focus on.
In general, cameras focus on the area of highest contrast under the active autofocus point. What they don’t tell you in the manual is that the actual area covered by each of autofocus sensors is much larger than it appears in your viewfinder. Even if you have autofocus pointed directly over the eye of your subject, the camera may still focus on the mic stand if your subject is low in contrast.
TIPS
Don’t place the head of the microphone in between you and your subject (you also get a covered face).
Focus on a high contrast feature of your subject’s face such as the eyes, eyebrows or hairline.
Use the center autofocus point of your camera (it’s the most accurate).
WHAT DOES IT LOOK LIKE TO SERVE
SCHEDULING
Sunday’s and Thursday’s: One photographer on Sunday.
Conferences: Usually 1-2 Photographers per conference per day.
Special Events (i.e. kids & youth camp, mens/women’s events, etc): At least 1-2 photographers for these type events.
At the end of each month we send out scheduling for the following month. The schedule will be placed on Planning Center Online (PCO). This will give team members access to view run sheets for the weekend.
WHERE DO I PARK?
Weekends: For weekend services you are welcome to park in Ventura Seventh-Day Adventist Church, in order to leave the church parking lot open for church members and first time guests.
Conferences/Events: For conferences and events, parking will be in the main lot.
CHEAT SHEET FOR NEW PHOTOGRAPHERS
Aperture, the more open the aperture, the more light the lens lets in, and the shallower the depth of field.
Shutter speed refers to how long the shutter is held open. The lower the slower the shutter speed the sensor can capture light, but also introduces motion blur. A good shutter speed at the Vacaville campus is anything over 1/160
ISO is the light sensitivity of the shutter, the higher the ISO the more grainy noise gets introduced into the image. The lowest ISO you can go without noise, the better.
